Step 1
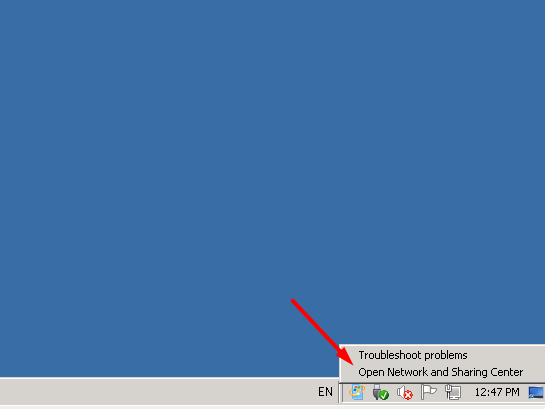
Login to your Server and open the Networking and Sharing Center, edit the Network Interface.
Step 2
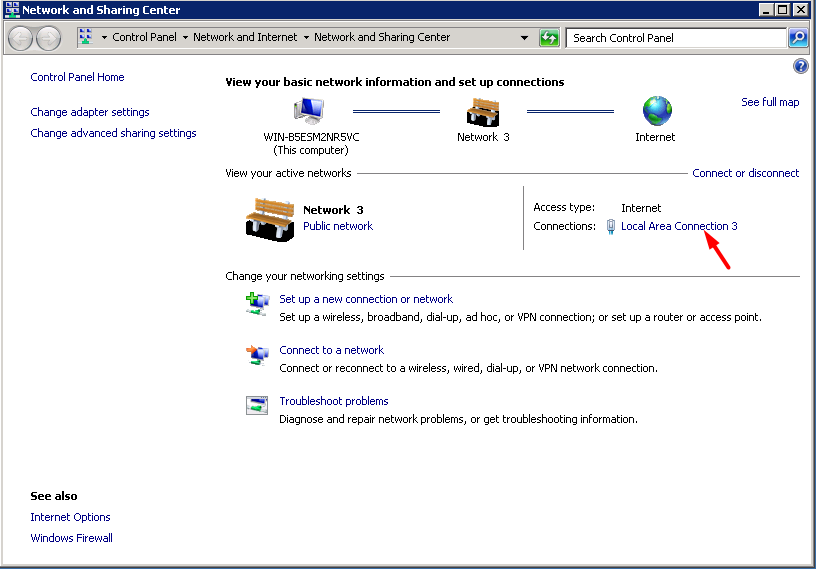
Under network and sharing center, select Change Adaptor Setting.
Step 3
At Local Area Connection. Notice it highlights blue and adds some options in the above line. Let’s click on “Change settings of this connection”.
Step 4
Step 5
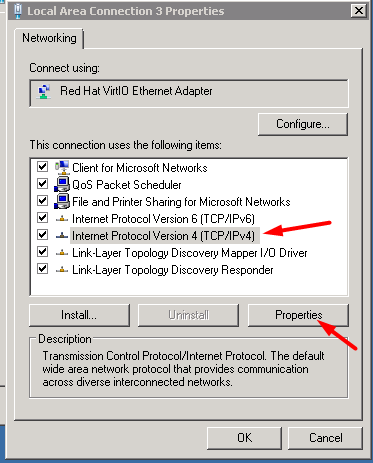
Now double click on “Internet Protocol Version 4 (TCP/IPv4)” or select it and click “Properties”.
Step 6
Step 7
By default, the system will use DHCP and an IP address is automatically assigned, if you would like to set up a static IP or to configure 2ndl IP, you are required to configure your primary/main IP to the static IP stated below.
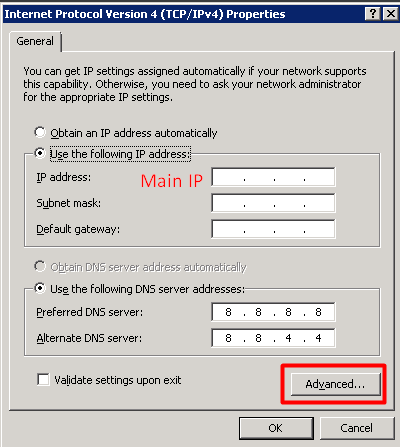
IP Address: Enter your IP Address Eg. xxx.xxx.xxx.xxx (for example your VPS Ip: 123.28.282.282)
Netmask: 255.255.255.0
Default gateway: Eg. xxx.xxx.xxx.1 [the last figure is 1] (for example your VPS Gateway: 123.28.282.1)
Preferred DNS: 8.8.8.8
Alternative DNS: 8.8.4.4
Step 8
Continue to configure additional IP, hit the advance option (as above), Now under the top section “IP addresses” click “Add…”.

Step 9
Enter the additional ip provided as below:
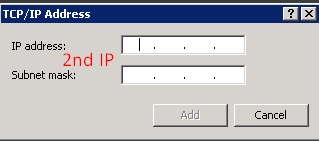
IP Address: Enter your IP Address Eg. xxx.xxx.xxx.xxx (for example your VPS Ip: 123.28.282.282)
Netmask: 255.255.255.0
Step 10
Press Add/OK until the end of the configuration Network Connections screen.
Step 11
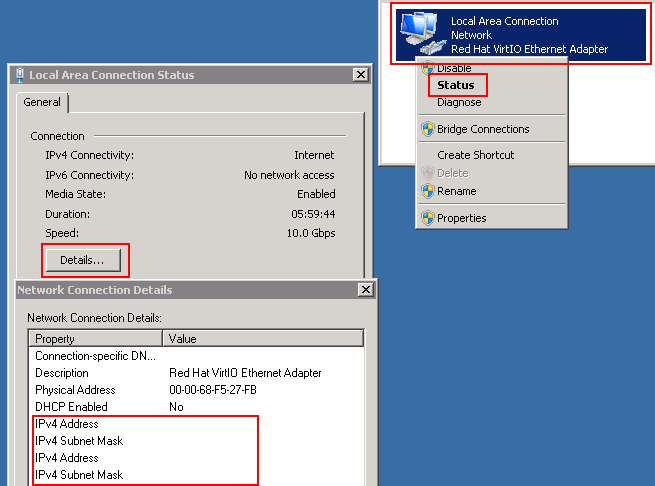
To verify if it is configured correctly. Right-click on Local Area Connection, click on Status, click on Details and look at the multiple IPv4 Addresses and the Subnet mask for each one. You should see all the IP configured.
If you are facing any issues or are unable to access after configuration, you can continue to troubleshoot by accessing using the VPS Control panel > VNC and reviewing your Server Configuration.
Should you need our assistance, please contact our support team for immediate assistance.
Have a nice day.

