How to Disable Automatic Windows Updates (Using Group Policy)
This guide explains how to disable or control Windows Automatic Updates using the Local Group Policy Editor. This method is recommended for Windows Server and Windows Pro / Enterprise editions.
Applies To Windows Server 2016 / 2019 / 2022 / 2025 Windows 10 Pro / Enterprise Windows 11 Pro / Enterprise
Step-by-Step Instructions
Step 1: Open Local Group Policy Editor
Press Windows + R
Type gpedit.msc
Click OK
Step 2: Navigate to Windows Update Policy
In the left panel, go to:
Computer Configuration
→ Administrative Templates
→ Windows Components
→ Windows Update
→ Legacy Policies
→ Manage end user experience
Step 3: Open "Configure Automatic Updates"
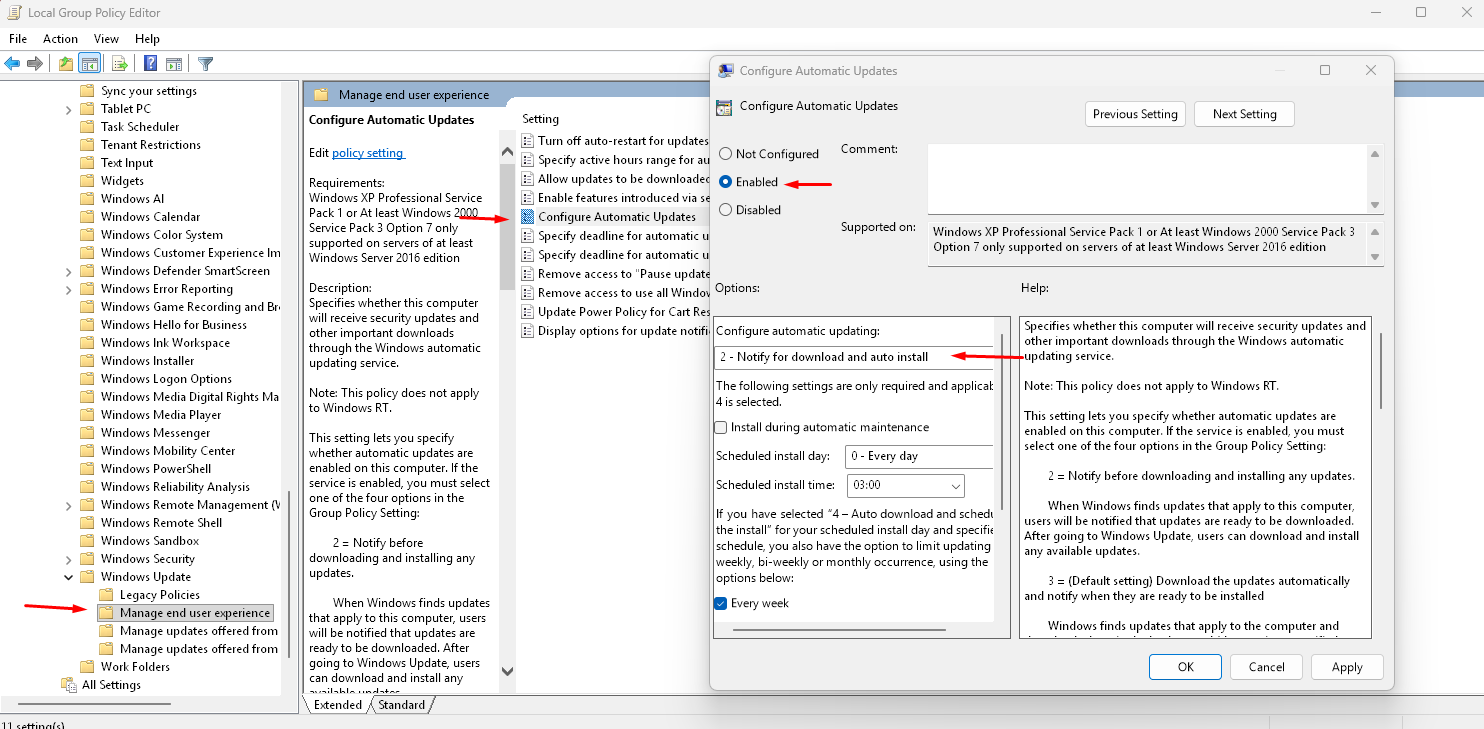
In the right panel, double-click Configure Automatic Updates
A new configuration window will open
Step 4: Disable Automatic Updates
Select Enabled
Under Options, choose one of the following:
Select
-2 - Notify for download and auto installs
Step 5: Apply the Policy
Click Apply
Click OK
Close Group Policy Editor
Step 6: Force Policy Update (Recommended)
Open Command Prompt as Administrator
Run: gpupdate /force
Restart the server (Optional)
To confirm the setting: Go to Settings → Windows Update
You should no longer see automatic downloading or installing of updates
Important Notes: Disabling updates may reduce system security. We recommend manual patching on a scheduled basis
Ideal for:
Production servers
Forex VPS
Game servers
Systems requiring uptime stability
