Introduction
When connecting to your Windows server via Remote Desktop (RDP), you may encounter the error:
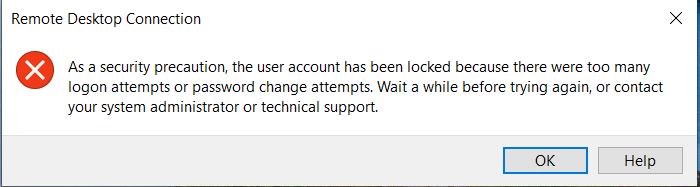
“As a security precaution, the user account has been locked because there were too many logon attempts or password change attempts.”
This happens when Windows detects too many failed login attempts and temporarily locks the account to protect against unauthorized access.
In this guide, we’ll show you:
-
How to unlock a locked user account
-
How to disable or adjust the account lockout policy
-
Best practices to keep your server secure while avoiding unnecessary lockouts
How to Unlock a Locked Account
If your account is already locked:
Method 1: Wait for Automatic Unlock
-
By default, the lock is temporary (e.g., 30 minutes).
-
After the duration expires, you can log in again.
Method 2: Unlock via Computer Management
-
Log in to your server using console access or another administrator account.
-
Press Win + R, type:
and press Enter.
-
Go to:
System Tools > Local Users and Groups > Users -
Right-click your locked user (e.g., Administrator) → Properties.
-
Check Account is locked out.
-
Uncheck the box, click Apply, then OK.
Method 3: Unlock via Command Prompt
-
Open Command Prompt as Administrator.
-
Run:
(This resets and reactivates the Administrator account. You’ll be asked to enter a new password.)
How to Disable or Adjust Windows Account Lockout for RDP
You can disable or adjust this policy using one of the following methods:
Method 1: Local Security Policy
-
Log in to your server using console access (not RDP).
-
Press Win + R, type
secpol.msc, and press Enter. -
Go to:
Account Policies > Account Lockout Policy -
Adjust the following settings:
-
Account lockout threshold → set to
0(this disables account lockout). -
Reset account lockout counter after → Not Applicable.
-
Account lockout duration → Not Applicable.
-
-
Apply the changes and close the window.
Method 2: Command Prompt
-
Open Command Prompt as Administrator.
-
Run this command:
This disables the account lockout policy.
Method 3: Group Policy (Domain Controller Only)
If your server is part of a domain:
-
Open Group Policy Management on your Domain Controller.
-
Navigate to:
Computer Configuration > Windows Settings > Security Settings > Account Policies > Account Lockout Policy -
Set Account lockout threshold to
0.
⚠️ Important Security Note
While disabling account lockout prevents accidental lockouts, it also increases the risk of brute-force attacks on your RDP login.
We strongly recommend:
-
Using complex, unique passwords.
-
Restricting RDP access to your own IP via firewall rules.
✅ After making these changes, your Administrator account will no longer get locked out due to failed login attempts.
