How to Reinstall the Operating System (OS) from VPS Control Panel v2
If you need a fresh start or want to switch to a different Linux or Windows OS template, you can easily reinstall the operating system on your VPS through the VPS Control Panel v2. This process will erase all data, so be sure to back up any important files before proceeding.
Important Notes Before Reinstalling:
- Reinstalling your OS will permanently delete all existing data on your VPS.
- Ensure you have backups if you need to retain any data.
- The process usually takes a few minutes depending on the OS template selected.
Steps to Reinstall the OS:
1. Log in to the VPS Control Panel v2
- Go to: https://vps2.vpsmalaysia.com.my/
- Enter your email address and password.
- For Password you may refer back to the welcome email we sent you regarding VPS details or click the "Forgot Password" button and a reset link will be sent to your email.

2. Select Your VPS
- Once logged in, click on servers, you’ll see a list of your active VPS services.
- Click on the hostname or label of the VPS you wish to reinstall.

3. Reinstall the OS
- On the VPS overview page, locate and click on the “Reinstall” tab.
- A list of available OS templates will appear (e.g., CentOS, Ubuntu, Debian, Windows).
- Select the desired operating system and version.
- Optionally, set a new root/admin password (recommended).
- Click “Reinstall” to start the process.

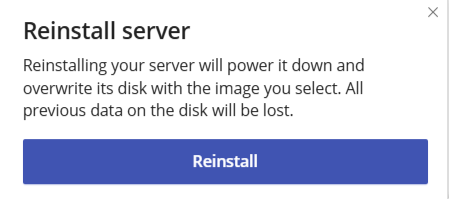
4. Confirm the Reinstallation
- A warning prompt will appear asking you to confirm the reinstallation.
- Click Reinstall to proceed.
- The system will begin reinstalling your selected OS.
- Your VPS will be ready after 30 minutes. Please do not reboot during the reinstallation process.
5. What Happens Next?
- The VPS will be formatted and a fresh copy of the selected OS will be installed.
- This process typically takes 30 minutes.
- Once the reinstallation is completed, you can access to your VPS.
- If you forget the password administrator/root you can reset via link : https://www.vpsmalaysia.com.my/system/knowledgebase/157/Reset-VPS-Password-via-Control-Panel---v2.html.
If you encounter any issues or your VPS fails to boot after reinstallation, please contact our support team through your Client Area. our team is ready standby and assist you.
If you are using the VPS Control Panel Version 1, click here to revert to the old v1 Control Panel and refer to the related v1 Knowledgebase article.
