Fail2ban is free and open-source IPS (Intrusion Prevention Software) that helps administrators secure Linux servers against malicious login and brute-force attacks. Fail2ban is written in Python and comes with filters for various services such as Apache2, SSH, FTP, etc. Fail2ban reduces malicious login attempts by blocking the IP addresses of the source attacks.
Setup UFW Firewall
Before you start installing Fail2ban, you will need to set up the Firewall on your Ubuntu server.
The default Ubuntu server installation comes with the UFW Firewall, which is easier to manage than another firewall like iptables.
Now check the UFW firewall status using the following command.
sudo ufw status
If you get the output message such as "Status: inactive", then your UFW firewall is not yet started. But if you get the output message such as "Command ufw not found", then the UFW firewall is not installed on your server.
To install the UFW firewall package, run the apt command below.
sudo apt install ufw -y
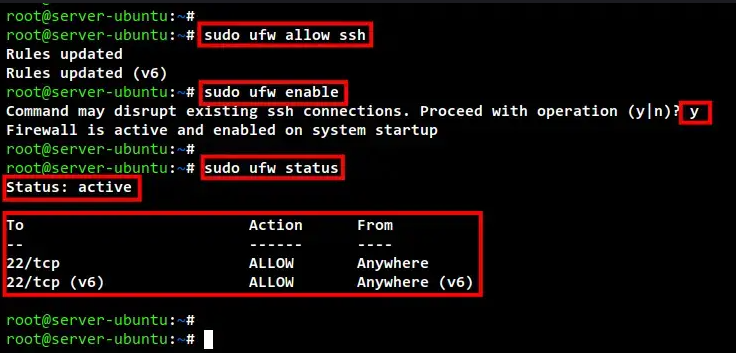
After UFW installation is completed, run the below command to add the SSH service to the UFW firewall.
sudo ufw allow ssh
Next, run the below command to start and enable the UFW firewall.
sudo ufw enable
Input y to confirm and start the UFW firewall.
Lastly, check again the UFW firewall using the following command.
sudo ufw status
Below you can see the UFW firewall "Status: active" with the SSH port 22 added to the firewall rules.
Installing Fail2ban on Ubuntu 22.04
After you have installed and configured the UFW firewall, now you will be installing the Fail2ban package to your server.
Run the following command to update and refresh your Ubuntu repository.
sudo apt update
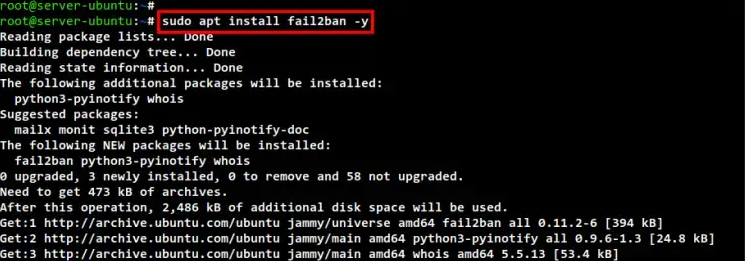
Now install the Fail2ban package using the below command.
sudo apt install fail2ban -y
The installation will begin.
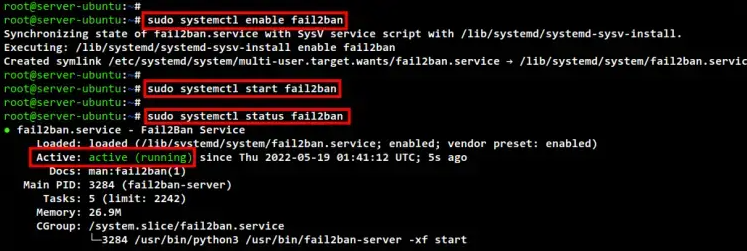
After the Fail2ban installation is completed, enable the Fail2ban service and start the service using the command below.
sudo systemctl enable fail2ban

sudo systemctl start fail2ban
Lastly, check the Fail2ban service status using the following command.
sudo systemctl status fail2ban
In the below screenshot, you will see the Fail2ban service is running on the Ubuntu 22.04 server.
Configuring Fail2ban to prevent Brutre Force Attack
After you have installed the Fail2ban, now it's time to set up and configure the Fail2ban.
All Fail2ban configuration is stored at the /etc/fail2ban directory. Below detailed Fail2ban configuration you must know:
- The configuration fail2ban.conf is the main configuration of Fail2ban.
- The configuration jail.conf is an example of the Fail2ban jail configuration.
- The directory action.d contains fail2ban actions settings such as mail settings and firewall settings.
- The directory jail.d contains additional configuration for fail2ban jail.
To start configuring Fail2ban, you will need to copy the default jail configuration jail.conf to jail.local using the following command.
sudo cp /etc/fail2ban/jail.conf /etc/fail2ban/jail.local
Now edit the configuration jail.local using nano editor.
sudo nano /etc/fail2ban/jail.local
For the ban settings, you can change the configuration as you need. In this example, the global bantime will be 10minutes, the findtime will be 10minutes, and the maxretry is up to 3times.
The bantime option is the time of IP address will be banned to access the server. The findtime option is the duration between the number of failures before the ban action. And the maxretry option is the number of failures for IP addresses to get banned.
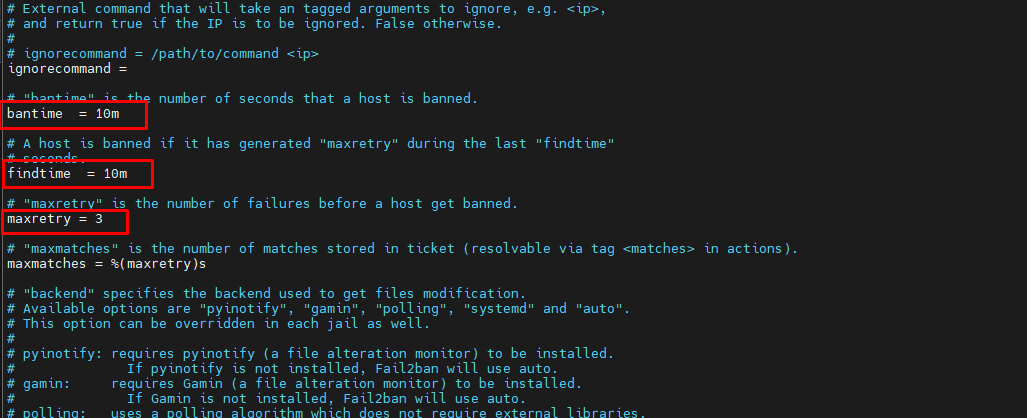
Furthermore please set backend = auto to backend = systemd and set jail enable = true in /etc/fail2ban/jail.local.


Using Fail2ban-client to Verify Fail2ban Status
The fail2ban provides a command-line fail2ban-client for interacting with the Fail2ban service. This allows you to manage and configure the Fail2ban from the command line, and also allows you to manage Fail2ban jails.
To verify fail2ban installation and configuration, run the fail2ban-client below command.
sudo fail2ban-client ping
If you get the output message such as "Server replied: pong", this means the Fail2ban is running without an error.
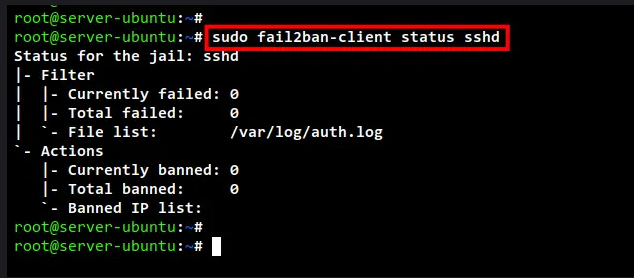
Next, run the fail2ban-client command below to check the status of sshd jail.
sudo fail2ban-client status sshd
Below you can see the detailed status of sshd jail. This includes the log file for the SSH service and the list of banned IP addresses on the sshd jail.
Now if you want to get a detailed configuration of the sshd jail, you can use the fail2ban-client command as below.
Check the bantime configuration for sshd jail. You will get the output of the bantime here in seconds.
Congratulation! You have now successfully installed and configured Fail2ban for securing Ubuntu 22.04.
Ban and Unban IP using Fail2ban-client
Another important thing about Fail2ban here is how to ban and unban IP addresses on Fail2ban. To do that, you can also use the fail2ban-client command.
To ban IP address manually on the sshd jail, you can use the fail2ban-client command below. Change the IP address with the IP address you want to ban.
sudo fail2ban-client set sshd banip IP-ADDRESS
To unban the IP address from sshd jail, you can use the fail2ban-client command below. Just be sure to change the IP address with the IP address you want to unban.
sudo fail2ban-client set sshd unbanip IP-ADDRESS
Now after you ban an IP address manually or unban an IP address, you can verify using the fail2ban-client command below.
sudo fail2ban-client status sshd
If you ban an IP address manually, make sure the IP address is available on the list of banned IP addresses. But if you unban an IP address, make sure the IP address disappears from the list of banned IP addresses.

